
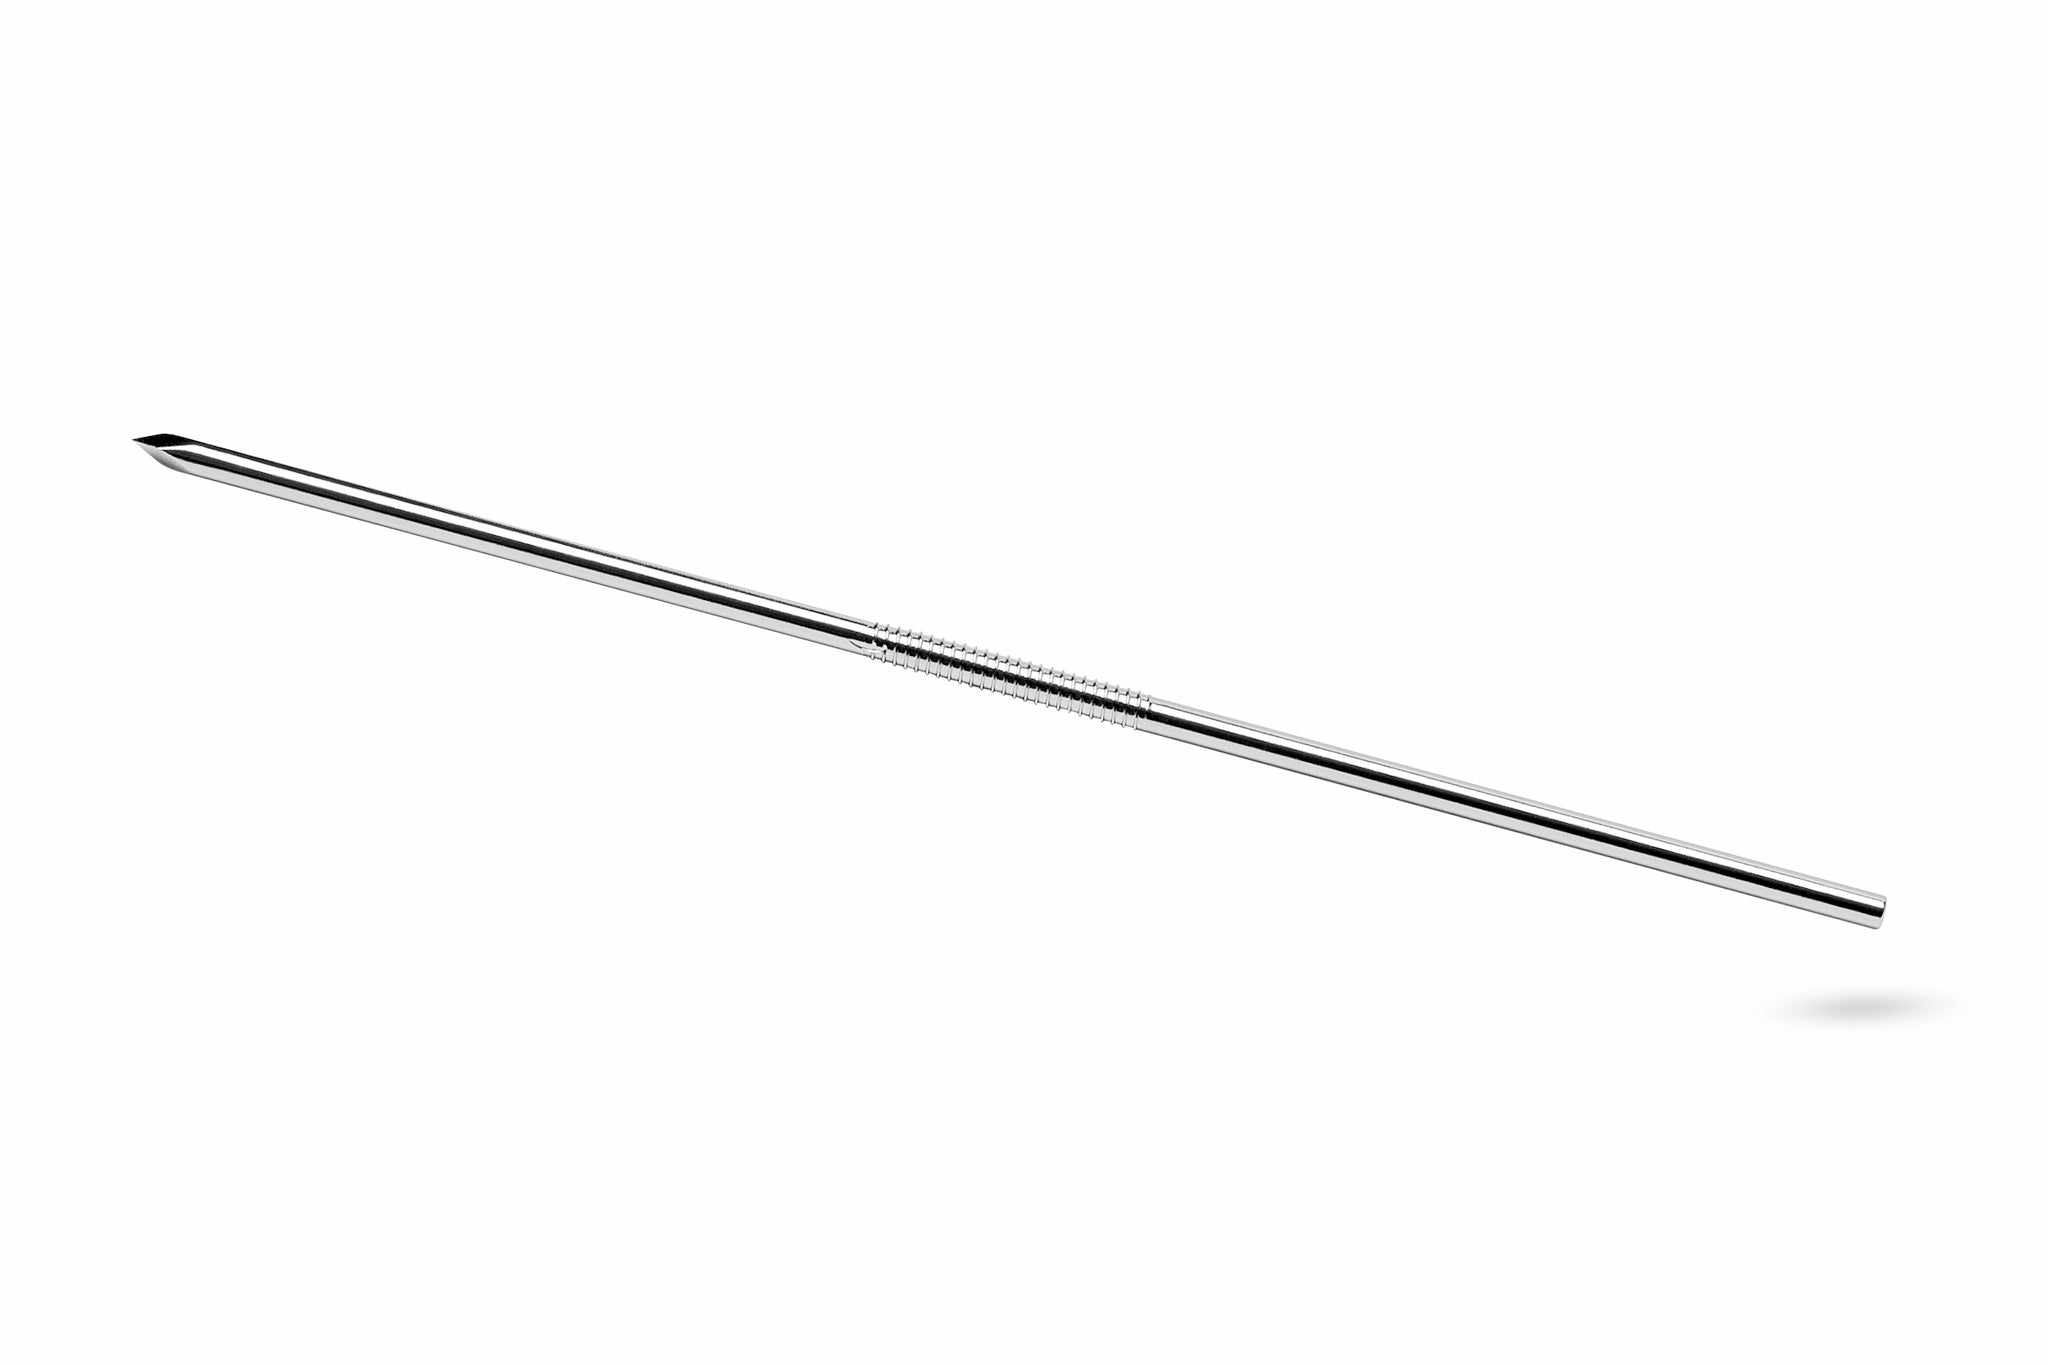
Miniature Centerface Fixation Full-Pin
Product Specifications
| Part No. | Compatible ESF Clamp | Length | Recommended Drill Bit | Shaft/Thread Diameter (inch) | Shaft/Thread Diameter | Thread Length |
|---|---|---|---|---|---|---|
| Part No. | Compatible ESF Clamp: Mini | Length (mm): 80 mm3.15 in | Recommended Drill Bit: 0.8mm | Shaft/Thread Diameter (inch): 0.035" | 0.045" | Shaft/Thread Diameter (mm): 0.9 mm | 1.1 mm0.0 in | Thread Length: 11 mm0.433 in |
| Part No. | Compatible ESF Clamp: Mini | Length (mm): 80 mm3.15 in | Recommended Drill Bit: 1.1 mm0.039 in | Shaft/Thread Diameter (inch): 0.045" | 0.056" | Shaft/Thread Diameter (mm): 1.1 mm | 1.4 mm0.039 in | Thread Length: 12 mm0.472 in |
| Part No. | Compatible ESF Clamp: Mini | Length (mm): 80 mm3.15 in | Recommended Drill Bit: 1.5 mm0.039 in | Shaft/Thread Diameter (inch): 0.062" | 0.075" | Shaft/Thread Diameter (mm): 1.6 mm | 1.9 mm0.039 in | Thread Length: 12 mm0.472 in |
Learn
The Learn section is a product-specific resource for veterinary surgeons and veterinary staff offering a variety of videos, image galleries, and quick tips on the use of IMEX products. To view additional educational content, visit our Learning Center.
FAQs
-
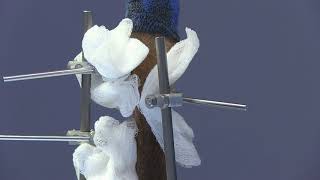
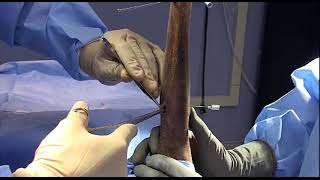
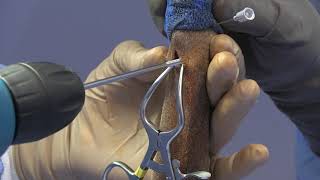
Is there a sequence and technique for placement of subsequent pins?
Typically, the third and fourth pins placed into an ESF frame are the two pins on each side and closest to the fracture. This is not mandatory; however, it is easier to verify accuracy of reduction and ensures good pin placement. These pins are placed via liberal release incisions and through pre-drilled holes. Placing the SK clamp over the area of soft tissue release, and using the secondary bolt to secure it in perfect alignment for the desired drill hole and pin position ensures correct targeting and pin placement. Next, the appropriate drill sleeve is passed through the primary pin-gripping bolt to protect the soft tissue as the bone is pre-drilled. One must be careful not to crush the thin-walled drill sleeve by tightening the primary pin-gripping bolt more than just enough to hold the sleeve in position. Pre-drilling is performed through the drill sleeve while exercising care not to exert undue pressure on the drill bit. Excess pressure results in drill bit flexing and a sudden “push through” of the drill bit into the opposite soft tissues as it breaks through the bone. The drill sleeve is then removed and low-speed insertion of the fixator pin is performed. After placing pins three and four, recheck reduction and alignment before placing additional pins. Repeat this procedure for as many additional pins as desired.
You Might Also Like
External Skeletal FixationExternal Skeletal Fixation > External Fixation PinsExternal Skeletal Fixation > External Fixation Pins > Duraface ESF Half-pinsExternal Skeletal Fixation > SK Linear ESF SystemNew ProductsPins & WirePins > External Fixation PinsProducts
Components_Pins | Wire Duraface ESF Half-pins External Fixation Pins External Skeletal Fixation Pin Thread Location_End Pins SK Linear ESF System
External Skeletal FixationExternal Skeletal Fixation > External Fixation PinsNew ProductsPins & WirePins > External Fixation PinsPins > External Fixation Pins > Large Animal Transfixation PinningProducts
Components_Pins | Wire External Fixation Pins External Skeletal Fixation Large Animal Transfixation Pinning Pin Thread Location_Center Pins
External Skeletal FixationExternal Skeletal Fixation > External Fixation PinsExternal Skeletal Fixation > External Fixation Pins > Interface Positive-profile ESF Half-pinsExternal Skeletal Fixation > SK Linear ESF SystemHome pageNew ProductsPins & WirePins > External Fixation PinsProducts
Components_Pins | Wire External Fixation Pins External Skeletal Fixation Interface Positive-profile ESF Half-pins Pin Thread Location_End Pins SK Linear ESF System